Triggering a webhook from Bessy is a convenient way to send data when a specific event occurs. This allows data and status changes to be synchronized with your own system in real-time, keeping all information up to date without the need to manually transfer data. Below, we explain which data is sent and how you can test webhooks yourself.
What data will be sent?
When a webhook is triggered, we send a standard JSON payload containing all relevant task information. This includes, for example:
- Task type
- Status
- Planned date, time and timeslot
- Checklist information
- Assigned tags
- Etc.
To see exactly what data is being sent, you can perform the webhook test described below.
Webhook Test Configuration
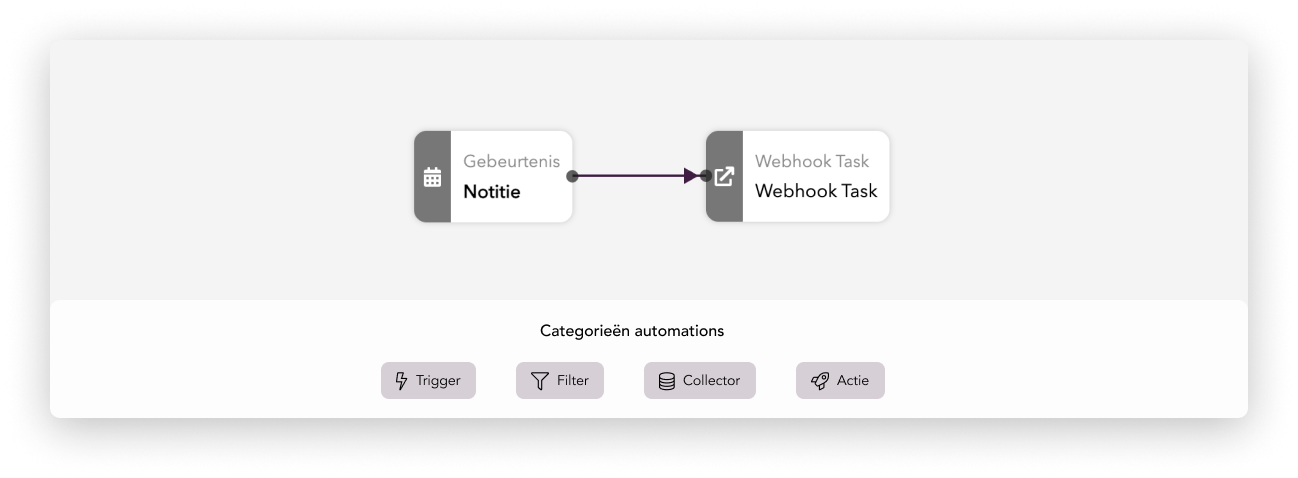
To set up the test, we’ll create an automation that triggers a webhook whenever a note is added to a task.
- Go to the automations section via the configuration panel and create a new automation.
- Choose ‘Gebeurtenis’ as the trigger and drag the card into the field. Right-click the card to select the event ‘Notitie toegevoegd’.
- Choose ‘Webhook Task’ as the action and drag this card into the field. You can now link the two cards together.
- Right-click the ‘Webhook Task’ card to enter the URL of the server where we should send the data when the webhook is triggered.
- If you don’t have a URL yet, you can use an external tool to create a temporary URL as described below.
Creating a Temporary Webhook (optional)
You can use an external tool to generate a temporary URL. This allows you to view incoming requests triggered by the webhook. For example, you can use Webhook.site.
Once there, you’ll be provided with a unique URL that you can paste into the ‘Webhook Task’ card in the automation you just created.
⚠️ Note:Not suitable for sensitive production data. Always use test data or mock payloads when working with public tools.
Testing the Webhook
Now it’s time to trigger the automation and test the webhook.
- Make sure the automation is active. Click the play button to publish it.
- Open an existing task or create a new one with test data.
- Add a note to this task.
- The automation will trigger and send the webhook to the specified URL.
- Navigate to the server receiving the webhook (e.g., Webhook.site). You’ll find a POST request containing all task data in JSON format.
With this setup, you can confidently test and validate your webhook integration before connecting it to your live environment. It’s a simple yet powerful way to ensure your systems stay in sync. Happy automating!